Scenario:
What is the On-Boarding Process of QNE Cloud Accounting System?
Solution
After completing the registration process and agreeing to Terms of Service and Privacy Policies, you will be taken to 3 Quick N’ Easy Steps On-boarding Process. You may now starts to set up your very first Company in QNE Cloud Accounting.

STEP 1: YOUR COMPANY
Fill-in your basic company information by entering the Business Name or Title, and choosing the Industry and Business Type from the pre-defined options in the dropdown selection.

Once completed, click ‘Next’.
STEP 2: ACCOUNTING SETUP
At this stage, you must define parameters pertaining to your Company’s followed Fiscal Period, which will be the standard of the system for financial reporting.
Identify the Fiscal Month and Year, as well as the Accounting Start Month or Cut-off Date, which will serve as the basis for your Account Opening Balances.

Chart of Accounts
You can decide whether to put up your own Chart of Accounts by selecting the "Blank Template (Empty Accounts)" option or use the pre-defined QNE Chart of Account Template (General Business).

Company Logo
Company Logo may also be setup in this stage. Drop and drag an image file or double click to upload.
As shown in the right part, where the system provides a Preview of the Company Report Header along with the Company Information entered from STEP 1, Logo Alignment may also be defined according to your chosen setting.

STEP 3: COLLABORATE WITH YOUR TEAM
Click 'Upgrade Plan Now' to choose a better Plan with more cutting-edge features that is appropriate for your accounting needs.

This step may be skipped by clicking ‘Maybe Next Time’ and proceeding to access QNE Cloud Accounting’s Free Plan that offers basic or limited features to users at no cost.
Finally, your company's initial setup is complete.
Click the 'Let's Go!' button’ to keep you logged in and let you proceed with the Dashboard.

Dashboard
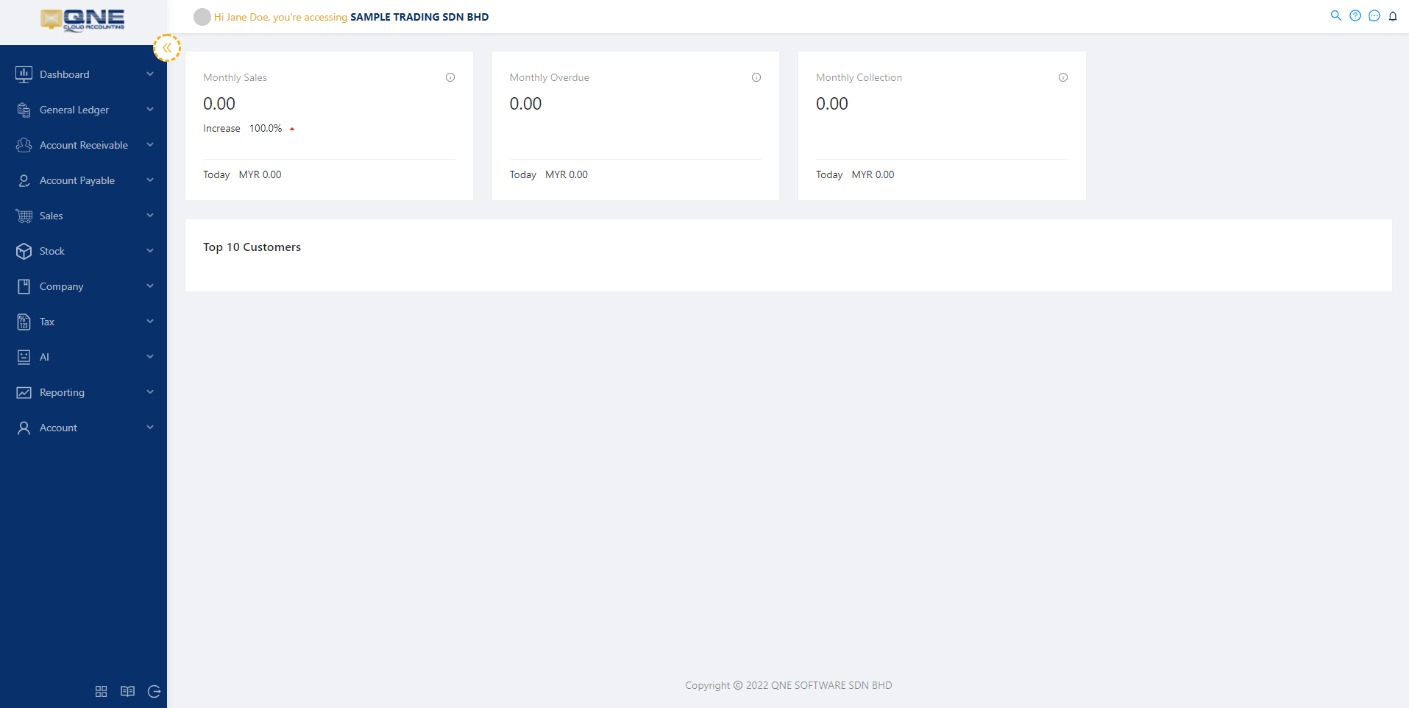
After successfully completing the 3 Quick N' Easy On-boarding Steps, it will already take you to your Home Screen that presents the Dashboard.
Be familiar with the Navigation Pane or the sidebar on the left, consists of the Modules where you can access your day-to-day transactions.

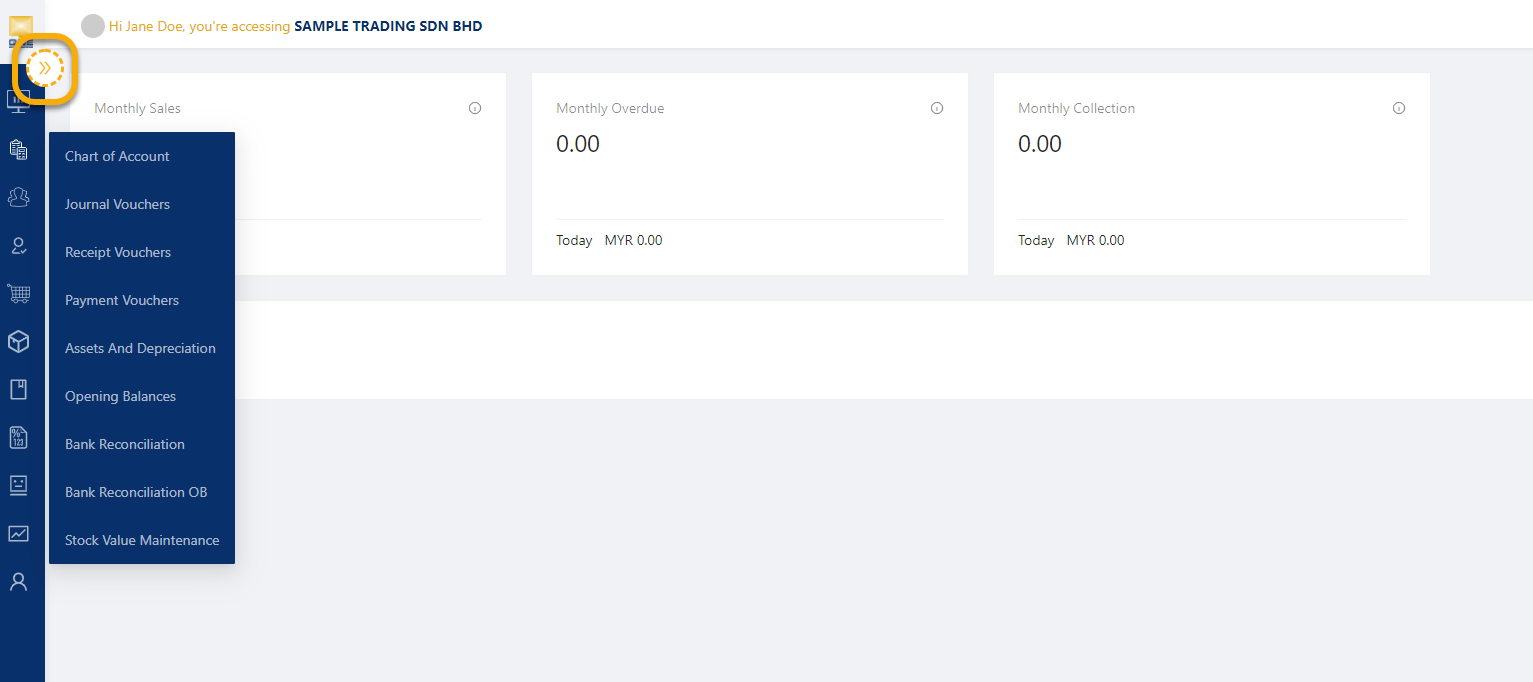
To have a larger center screen, you can select to hide the Navigation Pane by clicking the highlighted icon below. Then, you can mouse-hover to each Module to access the accessible menus.


NOTES
- Easily complete your On-Boarding process by following only 3 steps.
- STEP 1: Fill in your company basic information.
- STEP 2: Define Financial Period and Cut Off Date, Chart of Account Template, Upload Company Logo and adjust your Document Header.
- STEP 3: Choose to Collaborate with your Team with our respective plan.
- Access Dashboard and other screens via the Navigation Pane and start your journey with QNE Cloud Accounting System.
Was this article helpful?
That’s Great!
Thank you for your feedback
Sorry! We couldn't be helpful
Thank you for your feedback
Feedback sent
We appreciate your effort and will try to fix the article